Monday, July 28, 2014

Photo Class Week 4

I'll admit right away, I originally wasn't that sure how well I'd like this session, we were going to have some one come in an "model" for portraits.  I'm pretty sure still I wouldn't be a very good photographer of someone I didn't know, not really one to tell some one else how to stand, smile, look etc.  But on the other hand the techniques we learned and the information about how to use studio lighting that was fun. Just seeing the way the lights affected the mood of a photo I was taking really was cool. It was very interesting to see how positioning the model, versus where the light or how many lights were used changed a setting.  Below are some of my favorites, no Photoshop here, right from the camera. I actually think I composed some pretty good ones here.  In the end this was a really fun day.  Below are the pics with a description of where and how many lights were used to do the picture.
 One Light Forward and to the left
 One Light directly to the left
 Two Lights, first is forward and left second is down and pointed at the background
 Two lights, Left and behind to the back ground
Two lights, directly left and one behind pointed at her from right side
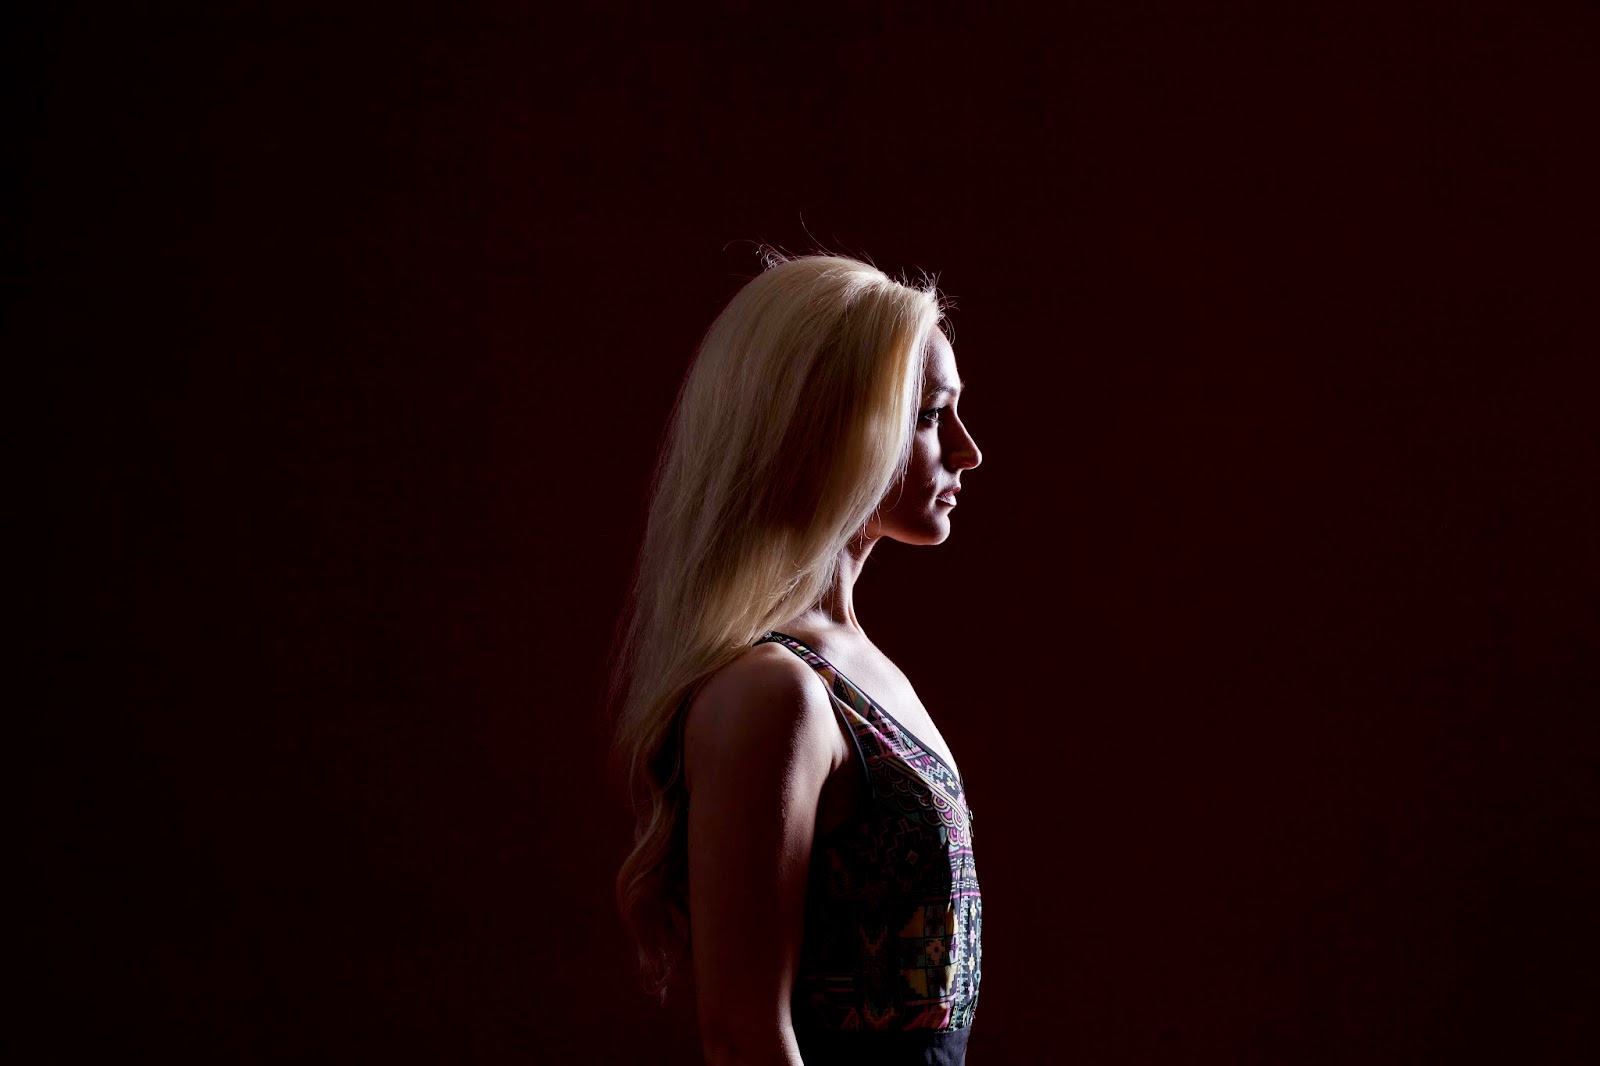
Single light from behind pointed at her
One light directly in front slightly up
Single light directly over head
Two lights one behind at screen with blue filter, second from behind at her
Ok so I forgot here how many lights but I do know the power was much higher on all and a white back ground
Single light behind her pointed at the background
Single light below, forward and left of her, with a honeycomb screen
Two lights, one forward and left, second low and to the screen with a blue filter and honeycomb (personally my favorite)
Similar to above, with wider honeycomb filter, no color
Light over head, was looking to show the affect of a patterned metallic background
Single Light, ring aparatus
Single light in broad daylight, bad framing
Same lighting as before, better framing
Single light in shade medium to low power
Similar to above, but higher power flash...with a little help from the sun (unintentional)

Wednesday, July 16, 2014

ISO lesson learned the hard way

This last weekend, Jill and I went on a drive with a dual purpose. First we went to Larned, Ks to pick up a limestone name rock for our front landscaping, secondly I wanted to do some Kansas landscape photography.   The first part of our trip was very successful, the rock we had ordered was better than we expected, and looks fantastic in our yard.  Now on to the return trip.  Looking at the map of Kansas and where we were off to, there were two places that I considered shooting at, Quivera and Cheyenne bottoms wetlands or the Gypsum hills.  I decided on the latter.  So leaving out of Larned to head south and west. We ended up not taking the fastest way to our starting point in the hills at Coldwater, but we made it eventually.  Then as we started down highway 160 towards Medicine Lodge I was starting to get disappointed that it wasn't as scenic as I anticipated. Needed some patience because we did eventually drive thru some of what I was hoping to see.  We pulled over 4 or 5 times take some shots, and looking at the camera before leaving it looked like I had got some good shots.  It wasn't until I got home and loaded them on the computer that I realized my mistake, I had forgot a very important setting, considering I was shooting in mid-day sun.  Leaving the ISO too high, all of my photos where pretty grainy. Still got a few good ones to share, even with the grains.


Apparently two filters and being as wide an angle as possible was not good with this lens...


Tried to recover this one with some photoshop techniques... still grainy


My first attempt at a panoramic stitching 6 photos together, while having the graininess I'm happy with the way it came together more or less. So I may have to go back and try around there again, and maybe be a little more adventurous and get off the main highway to get some other shots.

Sunday, July 6, 2014

Fathers' Day Gift

For a while now, I've wanted to take a class to get better at taking photos. Well this year Jill must have heard enough of me saying it and never doing anything about it, because she signed me up. Well technically she asked me if I would be interested first. But this is what I got for Fathers' Day this year.  A 5 week class with a local pro 3 hours on Sunday afternoons.  We are through three classes now and I thought I'd share some of the work I've done in class.  The first couple weeks were mostly on how to not use the camera in auto mode and what accessories were better buys for starters than others.  I'd experimented before in the manual, Av. and Tv. modes but only for specific situations, like using long shutter settings for fireworks and lightning shots or Apertures for portraits in low light. However, I never was really happy with the results.  But a couple weeks in now and I feel much more comfortable running only in manual mode. A lot of what I've learned in the first couple weeks is that what I thought I knew, or understood reading websites and such I really didn't understand as well. I had convinced myself that to get the best pictures and get the desired effects I always had to be a the widest aperture, lowest ISO and fastest shutter speed for a given situation.  Wow was I wrong, in class and in practice, I've found that I can still get great photo's, actually more consistent better photos not using my bad misconceptions.  The other big thing was not to try and make every photo perfect, take a few more and expect some bad ones but I'll still probably get my shot. This week I nearly filled my 16Gb card with 500+ pictures during class of which only a few were really good, but if I had tried to get this many good ones doing specific single shots, I think it would have taken me much more time. So with that here are few shots of what we worked on...

Lighting.


 Experimenting with shutter speed and ISO...


 How about some panning and f stop settings...


 And took slightly over 100 photos of water droplets, trying to catch the crown type drop...and this is as close as it came for me.


Hopefully from here it keeps getting better.


Saturday, January 28, 2012

"I love when it a plan comes together" - Weber Haus - Completed (18 Weeks)

Finally the last post in this series.  The house was move in ready on December 17th 2011.  Almost delayed since on the night before we planned to move in all of our kitchen appliances got stolen.  Now these weren't exactly your normal thieves, they were somewhat thoughtful.  Nothing else got torn up inside the house, the hardwood floor wasn't scratched, they turned off all the applicable breakers, pinched off the water line to the dishwasher, and took the time to unscrew the mounting screws for the microwave. That disaster adverted, our Builder/Realtor Doug was able to secure new appliances that day, and have them installed.  A few other little things we found got taken as well, the window screens and extra cabinet knobs.  We started moving things in that evening with a few loads of clothes, and a trip to Lowe's to buy some door reinforcements.  The house turned out much better than I think Jill and I originally imagined.  Then we were blessed to be able to close on both houses the Friday before Christmas, and not have the weight of worrying about two mortgages. Now a month later and now we are only waiting for little Jacqueline to arrive.